Decker Background

Showing posts with label Crafts. Show all posts

Friday, July 13, 2012

DIY Outdoor Drink Holder Tutorial

Good afternoon!

Friday the 13th - anyone superstitious? My husband and I actually got engaged on Friday the 13th and we've been married almost 19 years. So it is a lucky day for us!

Anyway, today's post is for something that I think 'can' be quite useful (no pun intended). How many times have you sat in your yard and had a drink in your hand and no where to put it? I know it happens to all of us. Well this cute drink holder solves that problem!

I'm sure you have figured it out by now that I like projects that upcycle or repurpose every day items. This one is no different. A simple tin can turns into an outdoor drink holder - not only something useful and cute, but it also keeps a can out of our landfills!

Do you need one? Well, here's how to make one for yourself - just follow my link:


Thanks to positivelysplendid.com for the tutorial!

Hope your Friday is fantastic (even if it is the 13th)! See ya soon.
Photobucket

Tuesday, July 3, 2012

T-shirt Fringed Flip Flops

Good Afternoon!  

It's been a while I know, but my hubby is on vacation and we are enjoying his time off! Swimming, grilling, relaxing have been our mantra for the last week or so.  We even fit in an awesome day trip which I will tell you about soon!

Today my post is about flip flops. You know the ones I mean - the not so cute ones that are about $3. Well they CAN be cute with this method.  If you are like me your kids or better half are an ever ending supply of old t-shirts - and that's just what you need to make these flip flops! 

Got you interested? Wanna know how? Well, follow my link to get the scoop!


 T-shirt Fringed Flip Flops, large

Thanks to Michael's Craft Store for the inspiration and instructions!

Have a terrific Tuesday! And a Fantastic 4th of July! See ya soon.
Photobucket

Saturday, June 16, 2012

DIY Mason Jar Solar Lights


Good morning!  

Have you been tackling all your outdoor to do list items? Well, I just might be adding to that list! I came across this project on pinterest and thought you might like them as much as I do!

I have to admit that this is the first time I have seen the technique of coloring the jars with Mod Podge, but I really like the way they look. It is very simple and has a great result.  The jars look good day or night!

I was thinking that these would like nice setting on your tables outside as well. So that would give you another option as opposed to hanging them. Well, if you want to know how it's done - follow my link!


A big shout out to Amanda at thehandmedownhouse.blogspot.com for sharing her tutorial - thanks a bunch!!!

Hope your Saturday is sunny - see ya soon!
Photobucket

Tuesday, June 5, 2012

DIY Beaded Flip Flops


Good morning!!  


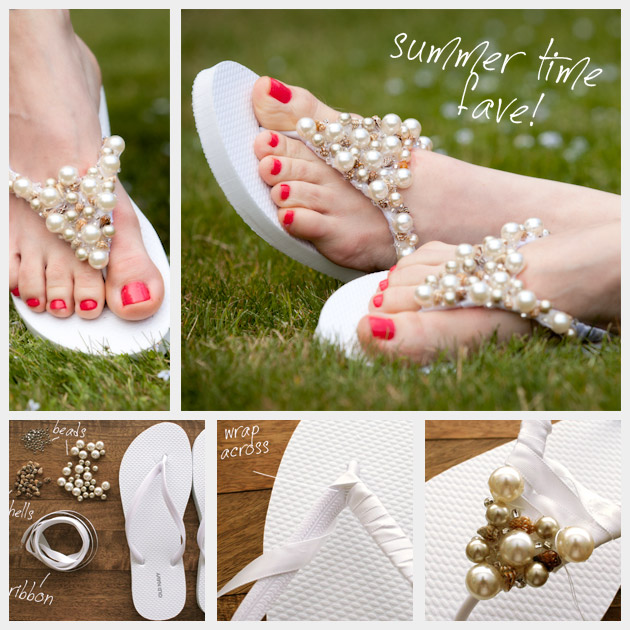
Summertime is quickly approaching! And with summer comes our favorite footwear - flip flops!!!  If you're like me you live in them during the summer. They are definitely my go to shoe when it's hot outside. 


Sometimes you are wearing something that just makes it hard to wear your good old stand by - the flop flop.  But fear not - that problem is now solved - easily and inexpensively!


Today's post give you the know how to dress up those boring flip flops into something glamorous! I even think that these would be awesome for the bride getting married on the beach or outdoors this summer - don't you agree?


Peeked your interest yet? Well, you know the drill - follow my link to get the scoop!

Beaded Flip Flops DIY

A super big thank you to trinketsinbloom.com for the tutorial!! 


Have fun creating your beaded flip flops - it will take them from blah to beautiful in no time at all! You may even want to do a few pair - LOL!!

Have a terrific Tuesday - see ya soon!
Photobucket

Wednesday, May 23, 2012

Buggy Birdfeeder - Lowe's Creative Ideas

Good morning!

It's been a long time since I posted, hasn't it? Sorry about that. I was spending a good bit of my time online looking for a car since one of ours died. No shame really since it was 10 years old! We've replaced it and now Mom has a new taxi!!

Anyway, today's post is a project that caught my eye at Lowe's Creative Ideas and I knew I would pass it along to all of you.  I have to admit that I have a soft spot for the birds and these feeders are just too cute.  It would be a nice project to do with your kiddo(s)! Check it out here:

Buggy Birdfeeders

buggy birdfeeders

Have a good over the hump day!  See ya soon!
Photobucket

Monday, April 30, 2012

PVC Mother's Day Bud Vase

Good Monday morning! 

Short post today.  Mother's Day is right around the corner and this project is perfect for the Mom who has everything.  What Mom wouldn't want a custom picture bud vase to admire along with some pretty flowers? I know I would love it.

Follow the link to see what's up:

Mother's Day bud vase from a PVC pipe. ~ Mod Podge Rocks!


Thanks to Mod Podge Rocks! for the tutorial!

Have a super Monday - see ya soon!
Photobucket

Thursday, April 19, 2012

Easy-to-Make Vases


Good afternoon!

Spring has sprung and with that comes Mother's Day and Teacher Appreciation Week. Today's vases would be appropriate for both of them! 

As you may have noticed by a few of my previous posts - I am a fan of the Lowe's Creative Ideas website as well as their monthly publication.  This is one of their projects. It appears to be fairly easy to make. These vases are quite unique and would be great in any color to match any decor!

So if you know a deserving teacher or are looking for a new way to give Mom flowers - check out the link to get started!

Easy-to-Make Vases - Lowe's Creative Ideas

PVC board vases

Don't they just make you think of spring and summer?

Hope your day is fantastic - see ya soon!
Photobucket

Wednesday, April 18, 2012

Easy Clothespin Snowflakes

Good morning! 

Spring break is over....it's time to get back to the grind.  School will be done in about 51 days and this school year is just flying by so quickly. I guess before we know it it will be Christmas time again - LOL!!!!!

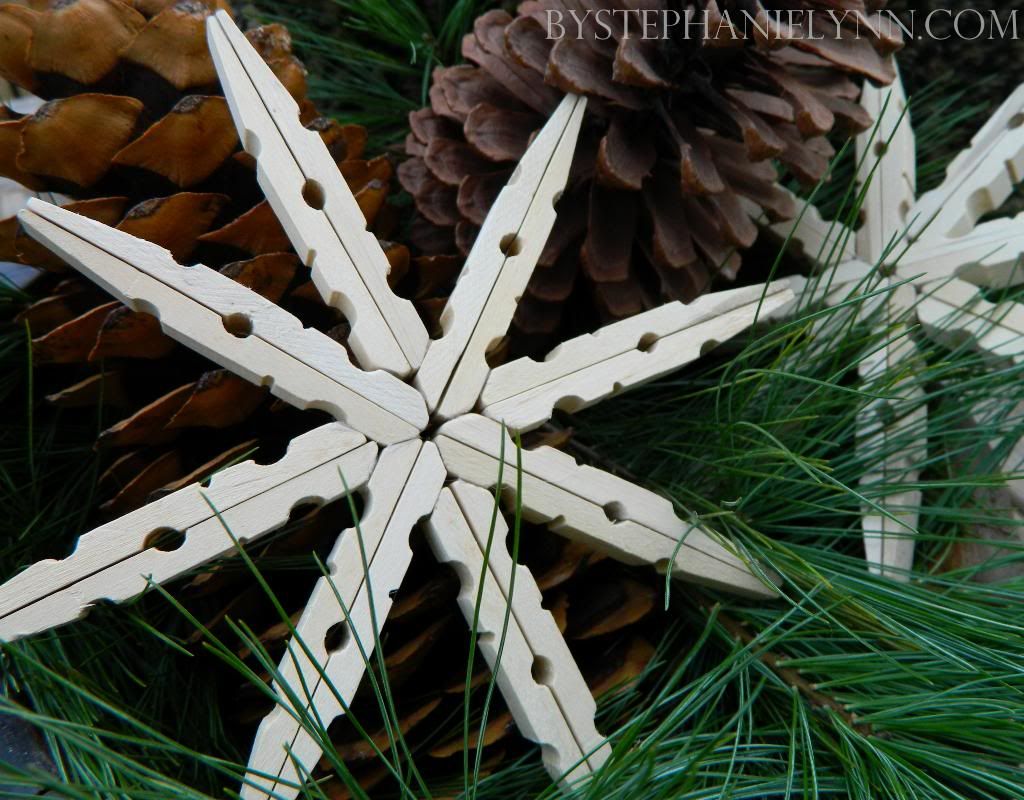
So I figured for my post today I would show you a Christmas project, which quite frankly I wish I had come across sooner. We decorated our Christmas tree this past year with only white lights and snowflakes.  We made most of the snowflakes and these would have fit right in with the decor. The instructions are very simple and I'm definitely going to make a bunch.  Although I love the natural wood appearance, I will probably paint some of them and even add a touch of sparkle!

You know it's never too late to start your holiday craft projects - so why not some Christmas in April or May or June - well you get the picture!! Want to know how to make them? Follow my link:

Clothespin Snowflakes


A great big thank you to bystephanielynn.com for the tutorial!! She has some amazing project tutorials - if you have time be sure to check them out.

Have a wonderful Wednesday - see ya soon!
Photobucket

Friday, April 6, 2012

Paper Bunny Pops Craft

Good afternoon!  

I have one more post for a last minute Easter Basket filler.  I love how simple these bunny pops are to make and that they are so cute! The link takes you to the instructions and printable bunny outlines.  Very Easy!!

Check it out here!

Paper Bunny Pops


Have a fantastic Friday!  See ya soon.
Photobucket

Tuesday, April 3, 2012

DIY Grocery Bag Easter Basket

Good morning! 

Are you ready for Easter? We just have a few last minute things to do and then we'll be ready. I was browsing pinterest yesterday and I came across this cute upcycle!  I thought it was a perfect little basket and it can be made at home! Plus, the instructions appear to be straightforward and it probably wouldn't take that long to make.  Need a cute basket for someone and don't want to go to the store?  Well, here's your solution! Go here to check it out:


DIY grocery bag Easter basket

Thanks to ellinee.com for the tutorial!!!

Have a terrific Tuesday! See ya soon.
Photobucket

Wednesday, February 22, 2012

The Bachelor and Redneck Wine Glasses

Good morning!  Hope everyone is well. I wish that I could say that I am. I've been fighting a terrible cough and cold - the darn thing just wants to hang on forever! So I haven't been feeling the best and many of my projects have fallen behind as a result.....

My hubby and I have been watching The Bachelor this season. We really liked Ben from the Bachelorette and felt bad for him when Ashley turned his proposal down. So we were happy to hear that he was going to be the next Bachelor. I don't know how many of you watch, but what about that Courtney?  Do you love her or hate her?  For us, she's in the hate category. I really do not want him to end up with her, but I've got this bad feeling that it will go that way!!!!!  I think he and Lindzi are a so much better suited couple.

And speaking of Lindzi, did any of you catch that they were drinking their wine in Redneck Wine Glasses? I thought that was awesome! So in honor of Lindzi and Ben and their hometown date, I thought I'd give you the heads up on making your very own redneck wine glasses - super easy, super inexpensive, and in my opinion super cute!  You know what to do - follow my link here:

Hillbilly Crystal/Redneck Wine Glasses


Big thanks to Cindy Eckhart (Sweet Tea with Cindy) for showing us how it's done!!


Hope you all have a wonderful Wednesday! See ya soon.
Photobucket

Thursday, January 19, 2012

T-Shirt Shag Rug

Hi!  I hope your day is going well so far.

I totally love this project.  If you have t-shirts that have seen better days this is the prefect way to upcycle them!  I think this would be awesome as a bathmat - soft jersey material under your feet!  I was going to use my son's old T's to make t-shirt yarn, but I just might have to take a few and make this rug for in my bathroom!

Thanks to Ginny over at ragsbysockmonkey.blogspot.com for sharing this tutorial!

T-Shirt Shag Rug Tutorial


Cute, huh? I hope you enjoy making your very own.

Have a great day!  See ya soon.
Photobucket

Saturday, January 14, 2012

Easter Rabbit Soap Holder

Good Saturday morning to one and all!

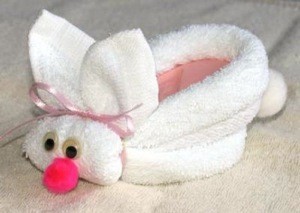
Funny thing - shortly after posting the bar of soap reindeer I came across this washcloth bunny! This project is just as cute as the reindeer - maybe even cuter! Thanks to thriftyfun.com for the instructions!  Follow my link to make it - Easter Rabbit Soap Holder


This might even be an easy project for younger school kids.  Maybe I should pass it on to my friend who teaches first grade!

Anyway, have funny making bunnies!  See ya soon.

Photobucket

Friday, January 13, 2012

Bar of Soap Reindeer Craft


Good morning! Happy Friday to you all. 


Just a short post today.

I really wish I had seen this before Christmas! I think it is sooooo cute - don't you? It seems that it would be so easy to make.  I don't have a tutorial for this since I came across the picture on pinterest, but I'm sure it wouldn't be hard to figure out how it's done!


This might be cute as a bunny, too. It could be for in Easter baskets. The nose would be a pink felt triangle or pink pom pom and the poem would need to be revamped but it just might work. Maybe I'll give it a try.

Well, that's it for today.  Have a fantastic day.  See ya soon!
Photobucket

Thursday, January 12, 2012

DIY River Rock Door Mat


Good Afternoon!  I so apologize for being a bad blogger lately.  I've been preoccupied with other things and sadly my blog has suffered for it.

But today I want to show you a project that is pretty cool.  It is a river rock doormat!  The tutorial is brought to you via oneprettything.com and says also that it could be made and used as a bathmat as well.  I'm not too sure about that aspect but I am thinking it would be a nice doormat.

Want one?  Go here to see how easy it is to make your very own!

River Rock Door Mat


The tutorial uses black stones, but I really like the natural ones like above.  Regardless of your own personal preference to the type of stone used - this is an easy project with a beautiful finished result! Wouldn't you agree?

Have a fantastic Thursday. See ya soon! (I promise.)

Photobucket

Thursday, December 29, 2011

DIY Votive Candle Holder


Happy New Year's Eve to one and all! Party plans abound I'm sure.  Just please be safe and don't drink and drive.    

This is a very special day for me because it is my 18th Wedding Anniversary!!  That's right - we got married on New Year's Eve at 9:00pm 18 years ago.  It seems like yesterday and I love my husband as much today as I did then - even more if that's possible! To my hubby - I Love You, Steve, and Happy Anniversary!

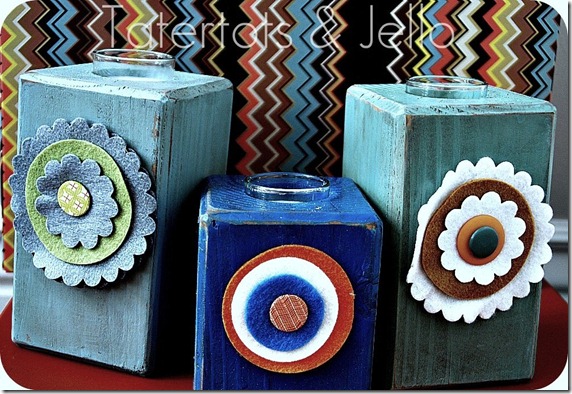
Today my post is a wood project.  I love the colors that were used and the decorations aren't really my style but they look awesome so I may have to give them a try.  You can always make any project your own just by using your creativity and this project is no exception.  Different colors, different decorations - whatever your heart desires.

I think these are quite lovely and would be very nice gifts as well. Thanks to Tatertots and Jello for the how to!  Go here to see more: DIY Candle Holder 

three pillar candles

Have a safe and happy new year celebration! See ya soon!

Thursday, December 15, 2011

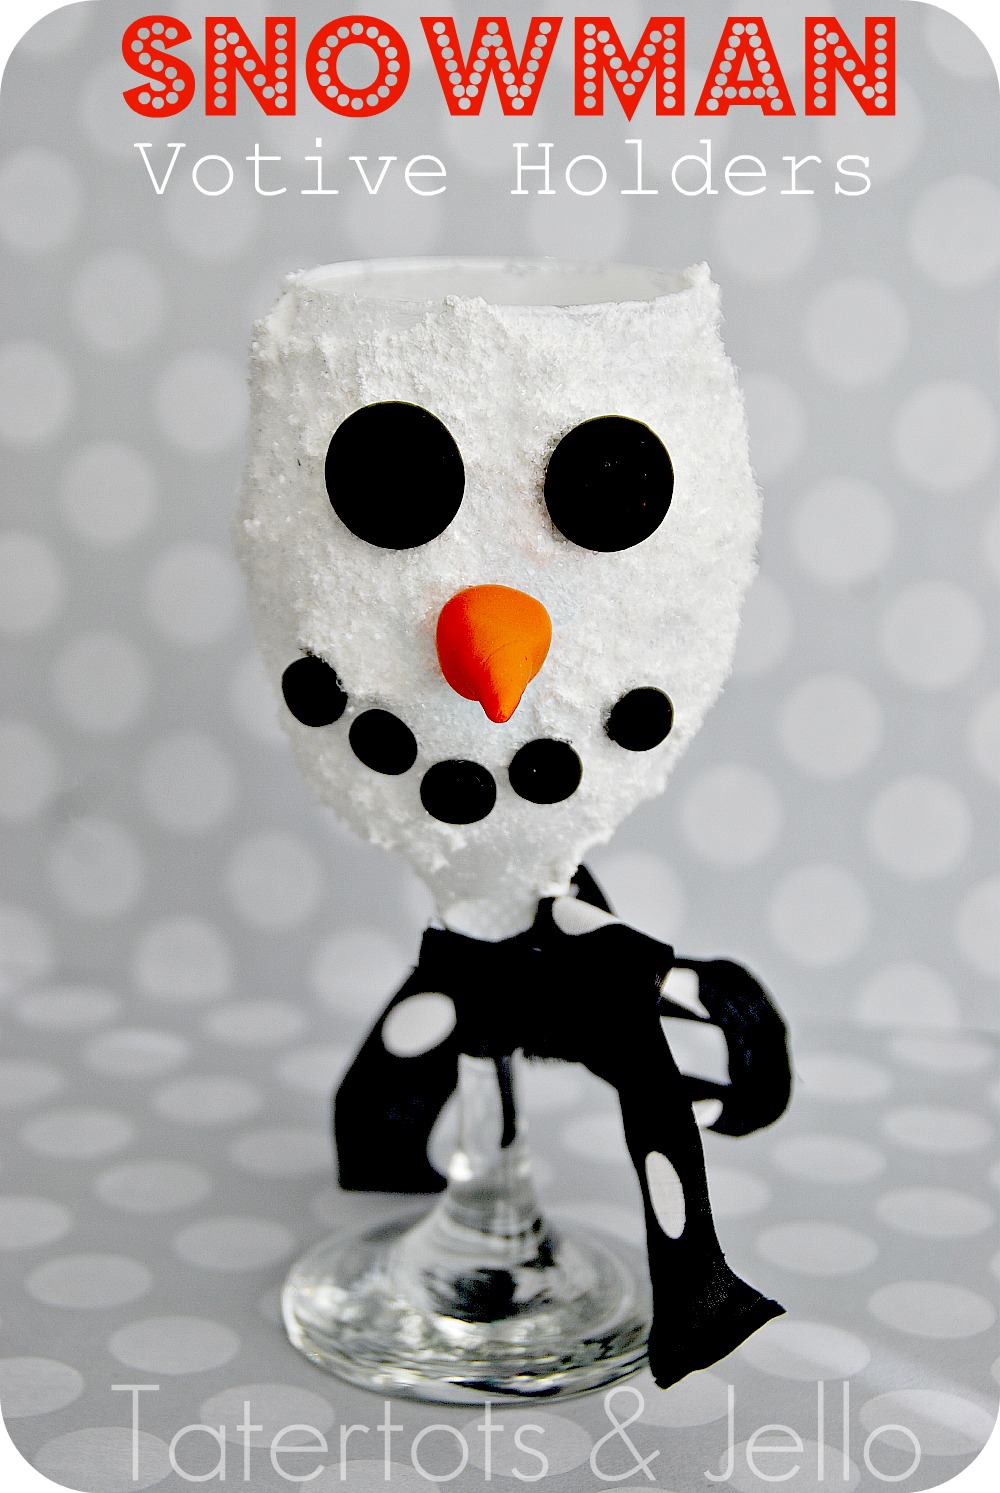
Wine Glass Snowman Votive Holders


Good morning!

My son is keeping a close watch on the calendar this year!  He informed me this morning that it is 10 days until Christmas....to him that seems like an eternity, but for the rest of us it's push time, right?

Today I want to show you these cute votive holders that are made from wine glasses.  I couldn't agree more that these would be cute teacher's gifts!  I wish I had come across them before now since we've already purchased this years teacher gifts.  But alas, there is always next year!

Wanna make some?  Check it out here: Snowman Votive Holder


I personally love snowmen and I love that they can be used into the new year because for me they just signify winter! These things are cute, cute, cute!  And it appears to be fairly easy to make them, too!

Thanks for looking and have a great day!  See ya soon!


Photobucket

Friday, November 18, 2011

New Soda Tab Bracelet


Happy Friday everyone!

I just noticed that it's been 2 weeks since my last post - WOW - time is flying by! The holiday season is getting closer and closer and there's so much to do!  And it seems like there's not enough time to do it! LOL

Today, I want to show you another Pop/Soda Tab Bracelet that I made recently. It is not as wide as the crocheted bracelet I did before. This one uses fabric strips and has a snap closure with a button decoration. 


From snap-end to snap-end this bracelet measures approximately 7.5 inches.  It can be made bigger or smaller very easily by using more or less tabs. You could use ribbon also, but I think it might be more expensive in the long run. You could also use other things to adorn and help cover the snap instead of a button. I just happened to have a button that matched the fabric I was using!

This bracelet is very lightweight and does have some flexibility and stretch to it.  The variety of colors available in fabric just blows my mind - you could have one in every color of the rainbow if you wanted!  The fabric I used is part of a fat quarter bundle that I already had, but they are sold at Walmart and lots of places online.

So, there you have it!  Start saving your tabs today and you can make one, too!  Have a fantastic Friday and I'll see ya soon!
Photobucket

Friday, November 4, 2011

Embossed Soda Can Snowsicles

Happy Friday everyone!

With Thanksgiving in a couple weeks and Christmas only being 51 days away, I thought I'd post this cute craft. I love long ornaments on the tree. It helps to fill in bare spots where the branches aren't quite as full. This ornament would be lovely on any tree and is easy to make.  Follow the link to get the step by step instructions!   


Get in the holiday spirit and make some today! 

Have a fantastic Friday and I'll see ya soon!
Photobucket

Thursday, October 27, 2011

DIY - 2 Variations of Giant Jenga

Good morning!

I really love this idea (can't you tell?).  My husband and I are planning on making this for our little guy.  But we have been debating using 2x4 or 2x3 studs.  I think that the 2x3 size will be better and not as heavy - although he thinks that the set will be larger using the 2x4 size (he's right, of course).   Apparently, it just comes down to personal preference!

As usual, once I decide to do something, I need to be sure to have the right instructions. (You know - kinda like measure twice - cut once....LOL) So with that being said, I found 2 more set of instructions - they both use 2x3 studs.

The links are below - one is plain wood and the other (which, in my opinion, looks awesome) is a multi-colored set and uses a Wii game concept.  We don't have the game but, I think I may have to see what I can find out about it.  It would definitely be fun to have a variation for the game!!

So, if I've peeked your interest and you are dying to make a set for yourself then follow the links below and get to cuttin' and sandin'!!! 

Jenga Maximum:

Jenga Maximum

Colored Mega Jenga Backyard/Jenga Based on Boom Blox

Coloured Mega Jenga (Backyard Jenga) based on Boom Blox

FYI - I've priced these sets on several sites and they range in price anywhere from $69.99 and up.  So if working with wood isn't your thing and you'd really like to have a set, then it could be a bit pricey to add this game to your collection!

Have a great Thursday.  See ya soon!
Photobucket
Related Posts Plugin for WordPress, Blogger...